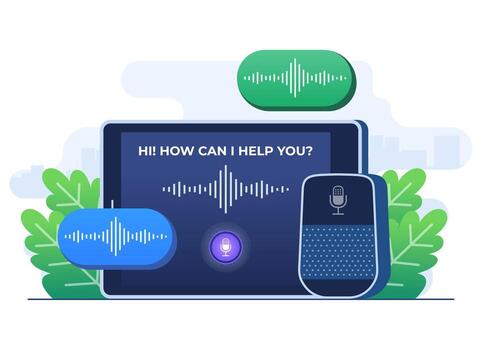
Voice interfaces are no longer a luxury—they’re becoming the default way humans interact with machines. Systems like Siri, Alexa, and Google Assistant have made conversational computing feel natural. Behind that simplicity lies a powerful combination of speech recognition, natural language understanding, and automation.
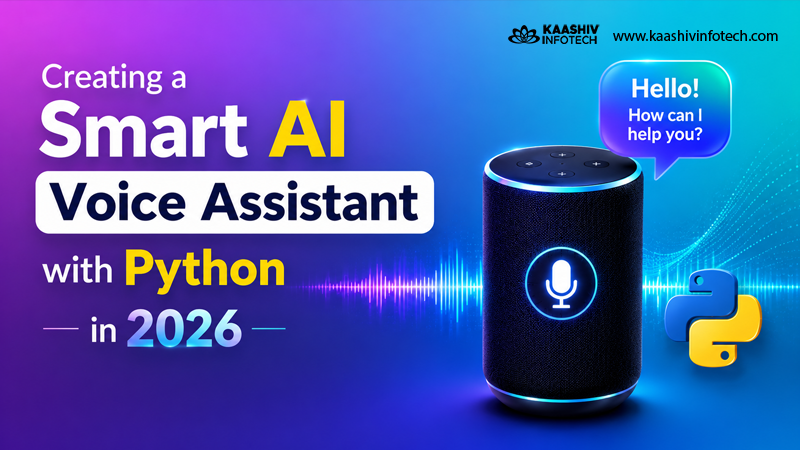
This guide takes a practical, developer-first approach to Creating a Smart AI Voice Assistant with Python in 2026. Instead of overwhelming you with short bullet lists, we’ll walk through the concepts deeply and build a working system step by step—then evolve it into something far more advanced.
Understanding the Architecture of a Voice Assistant
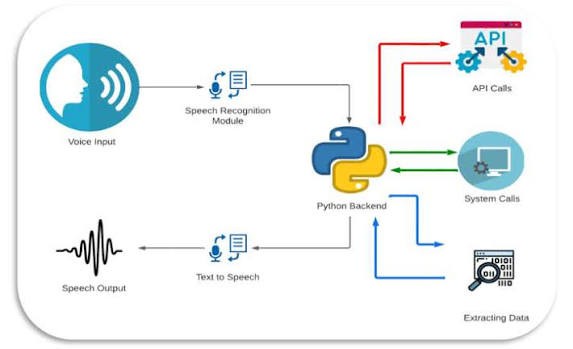
A voice assistant is essentially a pipeline that transforms sound into action and then back into sound. When a user speaks, the system captures audio through a microphone and converts it into text. That text is analyzed using techniques from Natural Language Processing to determine intent. Once the intent is understood, the assistant decides what to do—whether that means fetching information, executing a system command, or generating a response. Finally, it converts the response into speech.
This continuous loop—listen, understand, act, respond—is what gives assistants their interactive feel. The more intelligently each stage is designed, the more human-like your assistant becomes.
Core Technologies Behind the System
Python remains one of the best languages for building such systems because of its rich ecosystem. Libraries like SpeechRecognition allow you to capture and interpret voice input, while pyttsx3 provides offline text-to-speech capabilities. For deeper language understanding, developers often rely on tools such as spaCy or NLTK, which help extract meaning from sentences rather than just matching keywords.
In 2026, most advanced assistants also integrate AI services like the OpenAI API, which enables contextual, human-like conversations instead of rigid command-based interactions.
Setting Up Your Development Environment
Before writing code, you need to prepare your environment. Install Python and required libraries such as SpeechRecognition, pyttsx3, PyAudio, and Wikipedia. PyAudio can sometimes be tricky depending on your operating system, so using precompiled wheels or system-level installation is often necessary.
Once everything is installed, you’re ready to start building the assistant’s core capabilities.
Building the Voice Output System
The first step is making your assistant speak. This might seem simple, but it’s crucial because it defines how users experience your system. Using pyttsx3, you can generate speech offline without relying on external APIs.
<span class="ͼv">import</span> <span class="ͼ11">pyttsx3</span>

<span class="ͼ11">engine</span> <span class="ͼv">=</span> <span class="ͼ11">pyttsx3</span><span class="ͼv">.</span>init()

<span class="ͼv">def</span> <span class="ͼ11">speak</span>(<span class="ͼ11">text</span>):
    <span class="ͼ11">engine</span><span class="ͼv">.</span>say(<span class="ͼ11">text</span>)
    <span class="ͼ11">engine</span><span class="ͼv">.</span>runAndWait()

<span class="ͼ11">speak</span>(<span class="ͼz">"Hello, I am your AI assistant."</span>)
You can further refine this by adjusting speech rate, selecting different voices, or even adding pauses for more natural responses.
Capturing and Interpreting Voice Input
Next comes listening. This is where your assistant becomes interactive. With the SpeechRecognition library, you can capture audio from the microphone and convert it into text.
<span class="ͼv">import</span> <span class="ͼ11">speech_recognition</span> <span class="ͼv">as</span> <span class="ͼ11">sr</span>

<span class="ͼv">def</span> <span class="ͼ11">listen</span>():
    <span class="ͼ11">recognizer</span> <span class="ͼv">=</span> <span class="ͼ11">sr</span><span class="ͼv">.</span>Recognizer()

    <span class="ͼv">with</span> <span class="ͼ11">sr</span><span class="ͼv">.</span>Microphone() <span class="ͼv">as</span> <span class="ͼ11">source</span>:
        <span class="ͼ11">print</span>(<span class="ͼz">"Listening..."</span>)
        <span class="ͼ11">recognizer</span><span class="ͼv">.</span>adjust_for_ambient_noise(<span class="ͼ11">source</span>)
        <span class="ͼ11">audio</span> <span class="ͼv">=</span> <span class="ͼ11">recognizer</span><span class="ͼv">.</span>listen(<span class="ͼ11">source</span>)

    <span class="ͼv">try</span>:
        <span class="ͼ11">command</span> <span class="ͼv">=</span> <span class="ͼ11">recognizer</span><span class="ͼv">.</span>recognize_google(<span class="ͼ11">audio</span>)
        <span class="ͼ11">print</span>(<span class="ͼz">"You said:"</span>, <span class="ͼ11">command</span>)
        <span class="ͼv">return</span> <span class="ͼ11">command</span><span class="ͼv">.</span>lower()
    <span class="ͼv">except</span>:
        <span class="ͼv">return</span> <span class="ͼz">""</span>
This function continuously listens for user input and returns it as a string that your program can process. Handling errors properly here is important because real-world environments are rarely quiet or predictable.
Designing the Command Processing Engine
Once you have text input, the assistant needs to decide what it means. Early-stage assistants rely on keyword-based logic, where specific phrases trigger predefined actions.
<span class="ͼv">def</span> <span class="ͼ11">process_command</span>(<span class="ͼ11">command</span>):
    <span class="ͼv">if</span> <span class="ͼz">"time"</span> <span class="ͼv">in</span> <span class="ͼ11">command</span>:
        <span class="ͼv">from</span> <span class="ͼ11">datetime</span> <span class="ͼv">import</span> <span class="ͼ11">datetime</span>
        <span class="ͼ11">speak</span>(<span class="ͼ11">datetime</span><span class="ͼv">.</span>now()<span class="ͼv">.</span>strftime(<span class="ͼz">"The time is %H:%M"</span>))

    <span class="ͼv">elif</span> <span class="ͼz">"open youtube"</span> <span class="ͼv">in</span> <span class="ͼ11">command</span>:
        <span class="ͼv">import</span> <span class="ͼ11">webbrowser</span>
        <span class="ͼ11">webbrowser</span><span class="ͼv">.</span>open(<span class="ͼz">"https://youtube.com"</span>)

    <span class="ͼv">elif</span> <span class="ͼz">"who is"</span> <span class="ͼv">in</span> <span class="ͼ11">command</span>:
        <span class="ͼv">import</span> <span class="ͼ11">wikipedia</span>
        <span class="ͼ11">result</span> <span class="ͼv">=</span> <span class="ͼ11">wikipedia</span><span class="ͼv">.</span>summary(<span class="ͼ11">command</span>, <span class="ͼ11">sentences</span><span class="ͼv">=</span><span class="ͼy">2</span>)
        <span class="ͼ11">speak</span>(<span class="ͼ11">result</span>)
While this approach works well for simple use cases, it becomes limiting as complexity grows. That’s where AI-based understanding comes into play.
Running the Assistant Continuously
To make the assistant always active, you wrap everything inside a loop that listens and responds continuously.
<span class="ͼv">while</span> <span class="ͼy">True</span>:
    <span class="ͼ11">command</span> <span class="ͼv">=</span> <span class="ͼ11">listen</span>()

    <span class="ͼv">if</span> <span class="ͼ11">command</span>:
        <span class="ͼ11">process_command</span>(<span class="ͼ11">command</span>)
At this stage, you already have a basic working assistant capable of responding to commands, opening websites, and retrieving information.
Transforming It into an Intelligent AI Assistant

A rule-based assistant can only respond to commands it recognizes. To move beyond this limitation, you can integrate AI models using the OpenAI API. This allows your assistant to understand context, answer open-ended questions, and even generate human-like responses.
Instead of writing dozens of conditional statements, you can pass user input to an AI model and let it generate a meaningful reply. This transforms your assistant from a command executor into a conversational system.
Expanding Capabilities Beyond Basics
Once the core system is stable, you can gradually enhance it into a full-featured assistant. For example, you can connect it to weather APIs to provide real-time forecasts, integrate email functionality for communication, or enable music playback from local storage or streaming platforms.
A more advanced step involves adding memory. By storing previous interactions in a file or database, your assistant can remember user preferences and provide personalized responses. This is what makes modern assistants feel “smart” rather than reactive.
Another powerful direction is smart home integration. By connecting your assistant to IoT platforms, you can control lights, fans, or appliances using voice commands, bringing your project closer to real-world applications.
Improving User Experience with Interface Design
Although voice is the primary interface, adding a graphical layer can significantly enhance usability. Simple frameworks like Tkinter allow you to create buttons, status indicators, and conversation logs. More advanced frameworks like PyQt provide polished, professional interfaces.
If you want to go further, you can even deploy your assistant on mobile devices using tools like Kivy or connect it to a web interface through APIs.
Challenges You’ll Encounter in Real Development
Building a voice assistant is not just about writing code—it’s about handling unpredictability. Background noise, accents, and unclear speech can affect recognition accuracy. Performance can also become an issue if your assistant relies heavily on external APIs.
Addressing these challenges requires a mix of better hardware, optimized code, and intelligent fallback mechanisms. For instance, if speech recognition fails, your assistant can ask the user to repeat instead of crashing.
Security and Privacy Considerations

As your assistant becomes more powerful, it also gains access to sensitive data and system controls. It’s important to handle this responsibly. API keys should be stored securely, sensitive data should be encrypted, and potentially dangerous commands should require confirmation.
In the future, voice authentication may become a standard feature, allowing assistants to recognize and respond only to authorized users.
The Future of Voice Assistants in 2026
Voice technology is evolving rapidly. Assistants are becoming more context-aware, emotionally intelligent, and capable of functioning offline. With advancements in AI, future systems will not just respond to commands but anticipate user needs.
Companies behind systems like Alexa and Google Assistant are already pushing toward assistants that can hold long conversations, understand tone, and adapt dynamically.
Conclusion
Building a smart voice assistant using Python in 2026 is one of the most practical ways to explore artificial intelligence, automation, and real-world software development. What starts as a simple script can evolve into a powerful system capable of handling complex interactions.
The journey matters more than the end result. Begin with a simple assistant that can listen and respond, then gradually add intelligence, memory, and integration. Over time, you’ll not only build a powerful tool but also gain a deep understanding of how modern AI systems work.
If you want to dive deeper, kaashiv Infotech Offers, Django, Python Course, Full Stack Python Course & More, Visit Our Website www.kaashivinfotech.com.