TELECOM
Reliance Jio MNP: How to Switch to Jio Without Losing Your Number
Reliance Jio has disrupted the telecom market since it launched operations in September last year, and began providing free calls and ultra-low cost 4G data to consumers across India. the corporate is giving not just the info at extremely affordable rates but is additionally providing subscription to apps and 100 free SMSs to users under the continued Jio Dhan Dhana Dhan and Jio Summer Surprise offers. Already on the brink of 110 million people have signed up for Reliance Jio, and more might just switch thereto .
Free voice calling and lucrative data prices are bound to tempt many users to form the switch to Jio networks. rather than getting a replacement number, you’ll choose mobile number portability (MNP) to shift to the Reliance Jio network without changing your telephone number . In July last year, DoT made it compulsory for telecom operators to roll out nationwide MNP, allowing users to stay their telephone number albeit they switched carriers or locations. due to nation-wide MNP, subscribers of Airtel, Vodafone, Idea, and other telcos can shift to Reliance Jio and avail the free Preview Offer till end of the year without changing their number.
Here’s how you’ll use MNP to shift to Reliance Jio without changing your number:
First up, you would like to send a text message to your current operator requesting for a port out. The message PORT should be sent to 1900. In return, you’ll receive a singular Porting Code from 1901 with 15 days validity from your current carrier.
Head to any Reliance Mobile Store or retailer and refill the Customer form (CAF) where you’ll also fill within the porting code. Submit the specified documents (proof of address, proof of identity and photograph), and reciprocally Reliance will issue a replacement Reliance Jio SIM card. Once activated, this SIM will use an equivalent telephone number you already had, and your old SIM are going to be deactivated.
The Reliance Jio SIM could take up to 7 days to activate, and a fee of Rs. 19 are going to be charged. During porting, your number might be dead for about two hours (sometime between 10pm and 5am) before the new Reliance Jio SIM gets activated. Once your current SIM starts showing “No Service”, it’s likely time to place in your new Reliance Jio SIM.
Once ported, the Jio SIM should be activated, and remember you can’t use MNP to travel back to your earlier operator or somebody else for a minimum of 90 days. In his AGM speech, Ambani requested all the opposite operators to not limit customers’ right to migrate to Jio using MNP.
He also blamed the telcos of making a poor experience for Jio customers. He said that within the last week alone Jio customers faced 5 crore call failures to other networks due to insufficient interconnect capacity provided by competitors. Ambani claimed that the telcos were giving the impression to Jio customers that voice calling wasn’t working, when actually the telco operators were deliberately dropping calls.

Have you ever landed in a new country, eager to explore, only to realize you have no internet connection? It’s a common scene for travelers arriving in Japan. Navigating trains, translating menus, or finding a café can all depend on staying connected.
That’s where a Japan eSIM comes in — a digital solution that lets you access mobile data without hunting for a physical SIM card. With services like iRoamly Travel eSIM, travelers can activate a plan in minutes and go online the moment they arrive.
So,how to get an eSIM for Japan?Let’s find out.
Prerequisites for purchasing an eSIM in Japan
Before buying a Japan eSIM,it’s important to confirm a few basic conditions. Preparing these in advance ensures that your eSIM activation and data connection will work smoothly once you’re in Japan.
1. Check if Your Device Supports eSIM Technology
The first step is to confirm that your smartphone or tablet is compatible with eSIM.
Most recent devices—such as iPhone XR and newer, Google Pixel 3 and above, and many Samsung Galaxy S and Z series models—support eSIM functions.
You can usually find this option under “Mobile Data” or “Cellular Plans” in your device settings.
Without eSIM compatibility, you won’t be able to use a Japan eSIM, no matter which provider you choose.
2. Make Sure Your Phone Is Unlocked
Your phone must be carrier-unlocked to use an international eSIM plan.
If it’s still locked to a specific mobile carrier, the eSIM won’t activate properly in Japan.
Before your trip, contact your carrier to request an unlock—this process usually takes just a few days. Once your device is unlocked, you’ll be free to install any Japan eSIM.
- Stable Internet Connection for Activation
Downloading and activating an eSIM requires a stable internet connection.
It’s best to install your eSIM profile before leaving home—either via Wi-Fi or mobile data—so you’re connected as soon as you land.
- Understand Your Data Needs and Travel Duration
Finally, take a moment to estimate how much data you’ll need during your stay.If you mainly use maps, translation apps, or messaging, a small data plan may be enough. But for streaming or remote work, a larger plan is recommended.Providers such as iRoamly Travel eSIM offer flexible Japan eSIM plans that range from short-term tourist packages to longer options for business travelers, allowing you to choose one that fits your schedule and data habits.
How to Purchase an eSIM For Japan
Buying a Japan eSIM is a simple process, and you can complete it entirely online—either before your trip or while you’re already in Japan. Providers like iRoamly Travel eSIM make the purchase and setup process quick and traveler-friendly.
1. Purchase Online Before Departure
The easiest way to get a Japan eSIM is to buy one before you leave home.
Simply visit a trusted provider’s website, such as iRoamly Travel eSIM, select your destination (Japan), choose a data plan that fits your needs, and complete the payment online.
You’ll immediately receive a QR code or installation link by email, along with clear activation instructions. This lets you install and activate your eSIM in advance, so your data connection starts working the moment you land.
2. Purchase Through Travel Platforms or Apps
Many international travelers prefer buying through mobile apps or online travel platforms that aggregate eSIM options.
Platforms like these often include iRoamly Travel eSIM alongside other global eSIM brands, allowing you to compare pricing, data volumes, and validity periods easily.
Make sure to check coverage details and read user reviews—this helps ensure your Japan eSIM provides stable network performance across major cities and tourist areas.
3. Buy from Local eSIM Providers in Japan
If you’re already in Japan, you can also buy a Japan eSIM directly from local providers at airports, convenience stores, or electronics shops.
However, the process is often more expensive and may require staff assistance for setup.
In contrast, iRoamly Travel eSIM and other international providers let you skip the queues and manage everything digitally—ideal for travelers who prefer independence and speed.
How to Choose the eSIM that Suits You Best
With so many Japan eSIM options available, finding the right one depends on your travel style, data habits, and priorities. A thoughtful choice ensures you stay connected wherever you go—without overspending or running out of data midway through your trip.
1. Match the Plan to Your Travel Duration
If you’re visiting for a short vacation or business trip, a 7-day or 15-day Japan eSIM plan is usually enough. For longer stays, such as study programs or remote work trips, consider a 30-day or extended-use plan.Providers like iRoamly Travel eSIM offer flexible durations, making it easy to choose a package that fits your schedule.
2. Assess Your Data Usage
If you mainly rely on messaging apps, maps, and translations, a smaller data plan may suffice.
However, if you plan to use streaming services, video calls, or cloud-based tools, it’s better to choose a plan with more data or high-speed top-up options.
3.Check Network Coverage and Speed
Reliable coverage is essential, especially if you’ll travel beyond major cities like Tokyo, Osaka, or Kyoto.Look for Japan eSIM providers that partner with top local networks such as NTT Docomo, SoftBank, or KDDI.
4. Compare Pricing and Flexibility
While price is important, it shouldn’t be the only factor.Some low-cost eSIMs may have limited validity periods, slower data speeds, or lack customer support.Choose a provider that offers transparent pricing and flexible management。
5.Consider Customer Support and Ease of Use
Technical issues can arise when installing or switching networks, so responsive support can make a big difference.A reliable Japan eSIM provider should offer clear setup instructions, multilingual support, and quick troubleshooting.Travelers often appreciate how iRoamly Travel eSIM simplifies activation with step-by-step guides and 24-hour assistance, making it suitable even for first-time eSIM users.
FAQ
1. Can I use a Japan eSIM together with my home SIM card?
Yes. Most modern smartphones that support eSIM also support dual SIM functionality. This means you can keep your physical SIM active for calls or texts from your home country while using your Japan eSIM for mobile data.
2. Can I share my eSIM data with other devices (tethering)?
Most Japan eSIM plans allow personal hotspot or tethering functions, meaning you can share your connection with a laptop or tablet.
However, this may increase your data usage quickly, so check your plan’s data allowance before enabling it.iRoamly Travel eSIM supports hotspot sharing on compatible devices, which is helpful for travelers who need to work remotely or stay connected on multiple devices.
3. What if I change or reset my phone after installing the eSIM?
Once an eSIM profile is installed, it’s linked to that specific device. If you reset your phone or switch to another device, the eSIM may be erased.
To prevent issues, keep your original Japan eSIM email and QR code. With providers like iRoamly Travel eSIM, you can request reactivation support if you need to reinstall the eSIM on the same device.
4. Is it better to buy a Japan eSIM before or after arriving in Japan?
It depends on your preference:
- Buying before you travel ensures immediate connectivity when you land.
- Buying after arrival may give you access to local deals, but you’ll need Wi-Fi to complete the purchase and activation.
For most travelers, pre-purchasing an eSIM before departure is the more convenient and reliable option.
Conclusion
Japan’s eSIM card offers a convenient experience: no stores, no paperwork, no waiting—seamless connectivity anytime, anywhere.
No matter which provider you choose, our philosophy remains the same—travel is about more than logistics; it’s about the experience. Once you’ve set up your eSIM card, your world opens up: navigation becomes effortless, language barriers disappear, and every hidden cafe or tranquil garden becomes within reach.
In short, learning how to get an eSIM card in Japan is more than just a technical step—it’s a small travel skill that helps you focus on what’s truly important: exploring, discovering, and enjoying Japan without missing a single moment.
Butt connectors are not a rare product. However, you need to opt for a reliable provider if you want high-quality connectors. If you are looking for electrical connectors compliant with all the applicable standards, check WirefyShop.com.
There, you can find all connector types and accompanying products for all the applications:
- All wire terminal types for electric installations;
- Multi wire connectors for multiple installations;
- Wire crimping tools of all types, and many more product categories.
Whether you need ring terminals, heat shrink terminals, or any other crimp wire connectors, you can find them on WirefyShop.com.
Choose Connectors Correctly
A connector selected with the consideration of all the requirements is one of the prerequisites of the installation reliability and its long service life. Thus, it is crucial to consider every position in the list:
- Rating is one of those features that comes first. Every connector has a particular amperage value, pay the closest attention to it;
- The same standards do not mean that the electrical connectors are the same. Check carefully technical features to ensure you are buying the right thing;
- There are connectors that can be used in particular industries, such as marine, while others cannot. Make sure you are buying the items compatible with the application environment.
The good thing is that on WirefyShop.com, you can get a professional consultation with a specialist whether you need a connector for your car or you are going to buy a series of products for a new manufacturing facility. You can clarify all the details and choose the connectors that are the best fit.
Work with the Right Provider
It is recommended to opt for buying electrical multi connectors and related items from a specialized distributor. For example, if you buy connectors, wires, or whatever you might need, from WirefyShop.com, you can be sure that the distributor provides top-quality services.
It means not only high-quality products. It means that if a part, for example, a plug or a tap is broken, and doesn’t have an analog, the distributor will find a suitable replacement asap. If you need an auto or other type of connector to be ordered immediately, the order will be processed asap.
Finally, we aren’t all technicians. If you have a question about the pin type, or waterproof features of a cable, along with the possibility of its use in the automotive industry or, say, for multi purposes, a specialist will consult you and will help you to choose a suitable option.
With WirefyShop.com, you can be sure that you can find anything, for multiple and the most various projects. Add such benefits as free shipping and free return policy, and you will like the shop even more. What about a lifetime warranty? With WirefyShop.com, it is one of the benefits offered to all the customers. There, you will find all that you need for any electrical writing job!
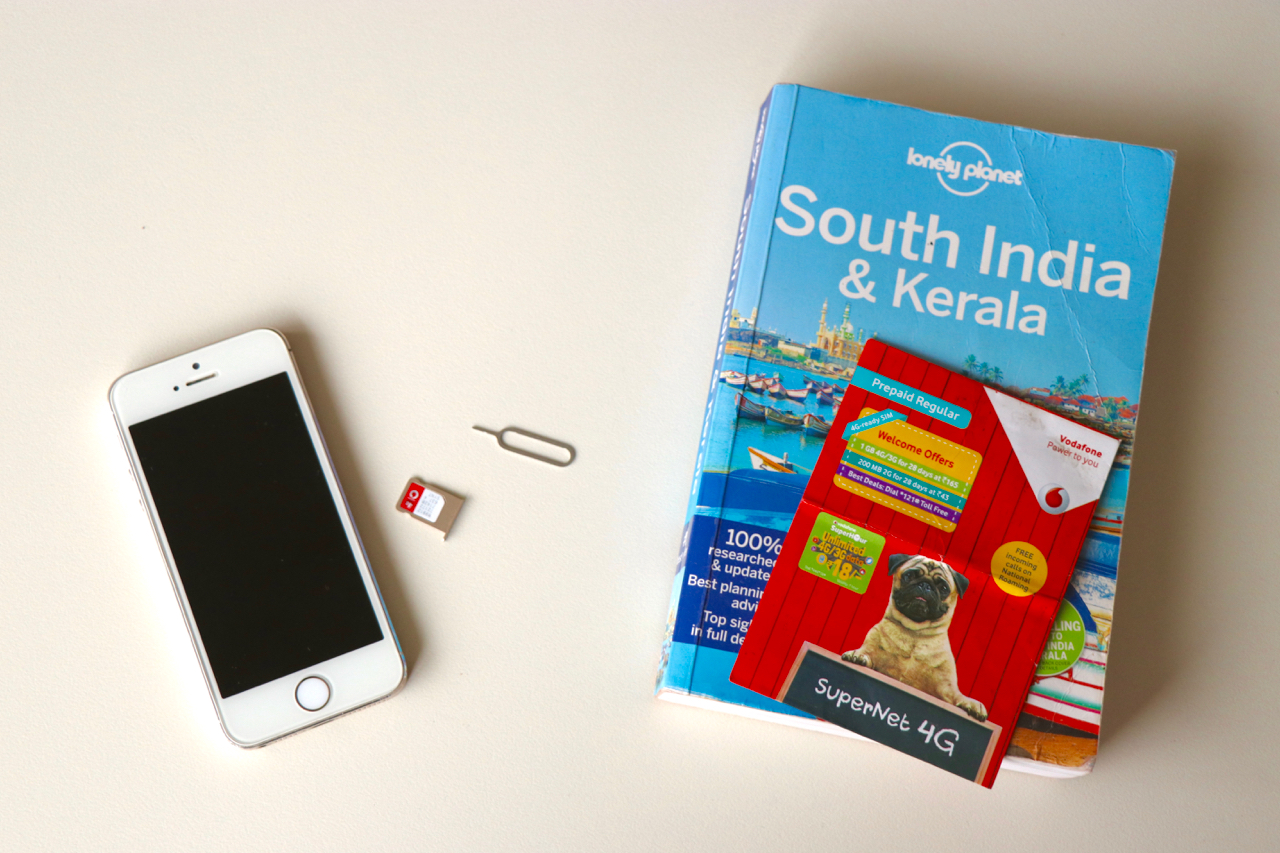
Since a mobile has become an important gadget to have , a SIM card that connects you to the network is simply as important. It’s not difficult in the least to urge one in India, as long as you’ve got the proper documents for it. Whether you’re an Indian citizen or a far off national, this guide will explain the way to buy a SIM card in India.
How to buy a SIM card if you’re an Indian citizen
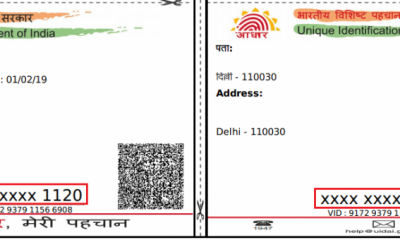
For Indian citizens, the method to urge a replacement SIM card is straightforward enough, if you’ve got an Aadhaar card.
- Take your Aadhaar card to the telecom operator’s store. you’ll download a replica of your Aadhaar card and print it or take a soft copy via mAadhaar app also . a number of them might invite a photocopy or an emailed copy of this card. For the eKYC (online Know Your Consumer) process, you don’t need a tough copy of the Aadhaar card but some telecom operator stores may invite this, albeit it’s unnecessary.
- The store personnel will key in your Aadhaar number and ask you to authenticate your identity via your fingerprints.
- Once this is often done, you’ll get a replacement SIM card and it’ll be activated either immediately or within 48 hours, counting on the telecom operator.
If you don’t have an Aadhaar card, the method to shop for a replacement SIM card in India varies from operator to operator, and a few may even refuse to offer you a replacement connection. Here are the documents you’ll need if your operator allows you to urge a replacement SIM without Aadhaar.
- Address proof, with photocopies (such as a rent agreement, electricity bill, bank passbook, etc)
- Government-issued photo identity proof, with photocopies (such as driver’s license , passport, voter ID, etc)
- Two passport sized photographs
After you submit these documents, your application will take a while to be processed and therefore the SIM card are going to be activated once that’s done. Note that if you’re a resident of Jammu & Kashmir or any of the states in Northeast India, then prepaid connections might not be available, otherwise you may need to attend longer to urge a SIM card – albeit you’ve got an Aadhaar card.
How to buy a SIM card if you’re a far off national
If you’re not an Indian citizen and are visiting India, the method to urge a SIM card is different from that for Indian citizens. For starters, foreign citizens don’t have Aadhaar cards, in order that they need a special set of documents. Gadgets 360 visited two different stores of every of those three telecom operators — Airtel, Vodafone, and Reliance Jio — to seek out out what the method is for foreign nationals. Since there’s no Aadhaar for biometric identification , foreign nationals need to fill a paper form to urge a SIM card.
If you would like a prepaid (pay-as-you-go) connection, visit the closest Vodafone, Airtel, or Reliance Jio store in India with the subsequent documents.
- Passport, with a photocopy
- Photocopy of the visa
- Passport-sized photographs (usually only one needed, but carry four just just in case since telecom operators require four photographs in some Indian states)
For postpaid connections, you would like the subsequent documents. This varies slightly from carrier to carrier, but take these documents (and if you’ll , an Indian national who can vouch for you) to the shop , just to get on the safe side.
- Passport, with a photocopy
- Photocopy of the visa
- Passport-sized photographs (usually only one needed, but carry four just just in case since telecom operators
- require four photographs in some Indian states)
- Details of an area reference
- Proof of local address
This means that you simply got to give contact details of any Indian national you recognize (ideally a lover or a relative) and a symbol of your Indian address like electricity bills or a rent agreement. For postpaid connections, the telecom operator may additionally enforce a verification at your local address, so a representative might visit your residence in India within every week of issuing the SIM card. In some cases like Overseas Citizen of India (OCI) cardholders, you would like to supply that card and submit a photocopy while procuring a replacement SIM card.
While these processes are standard across telecom operators, we found some minor differences within the fine print. Vodafone store representatives told Gadgets 360 that new connections typically take around two hours for activation. Both Airtel and Reliance Jio said it takes up to 24 hours to activate your SIM card.
Pre-activated SIM cards
Normally, pre-activated SIM cards aren’t available in India but the govt recently announced that the state-owned telecom operator BSNL are going to be offering these for free of charge , with talk time worth Rs. 50, at various airports in India. this is often available only to those that get e-visas for India. Unfortunately, we haven’t been ready to independently verify whether this is often available, or if the SIM card works as advertised.
There’s another alternative to urge a pre-activated SIM in India, and that’s by employing a service like Trabug, which allows you to rent a smartphone that features a pre-activated SIM card for up to 80 days at a time. They ship the phone to your Indian address too, so you’ll stay in-tuned together with your friends and family. The downside is that the pricing is extremely expensive and you can’t use your own smartphone with the SIM Trabug offers. you’ve got to use the phone rented from Trabug. For unlimited calls and 3GB data per day, Trabug charges $60 (roughly Rs. 3,900) plus $1 (roughly Rs. 65) per day for the duration of your stay. If you get an area SIM card and use it together with your smartphone, you’ll get 1GB of knowledge per day with unlimited free calls anywhere in India by paying around Rs. 500 ($8) for 3 months. you’ll do the maths yourself and find out what proportion you’re saving by getting an area SIM card, albeit it means you’ve got to spend a touch little bit of time getting to the shop and submitting some documents.
Roaming charges in India
Another thing that confuses many foreign citizens visiting India is roaming charges. Services in India are split across various telecom circles, and moving from one circle (usually a state, though not always) to a different , involves roaming. At the instant , most carriers allow you to receive phone calls across India without paying anything extra. For outgoing calls, there’s normally no extra charge as long as you’re within the same telecom circle as where you purchased the SIM card. If you go outside the circle, you’ll need to pay per minute for outgoing calls, but there are certain plans that permit you avoid that charge altogether. Just ask the carrier for free of charge outgoing calls while roaming and you’ll be offered a reasonably affordable plan for that. Finally, data roaming doesn’t cost anything extra in India. you’ll still use mobile data across India on any telecom operator without incurring extra charges.
SIM card validity in India
Prepaid SIM cards in India ship with lifetime validity, so as long as you retain getting a recharge and using the SIM, it should not be deactivated. If the SIM is inactive, the shop reps we spoke with said that it’s discontinued in 90 days. For foreign nationals, the telecom operators we spoke with said validity lasts till their visa expires.

Pokémon GO Hack Guide: How to Join Mega Mewtwo Y Raids Without Traveling

How to Change GPS Location on iPhone Without Jailbreak

MetaTrader 4 or 5: Which Trading Platform Is Right for You?

Why Modern Web Applications Are Moving Beyond Basic Dashboards
YouTube Offline: What Is It, and How to Save and Watch a Video Offline?

How to Download a Copy of Your Aadhaar Card

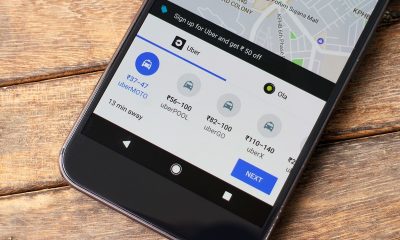
How to Book an Ola or Uber Using Google Maps

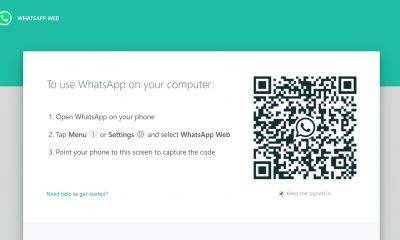
WhatsApp Web: Everything You Need to Know

The Surge of Mobile Betting Apps in India

In-depth Review of Parimatch: A Top Choice for Indian Punters
-
 Internet6 years ago
How to Download a Copy of Your Aadhaar Card
-
 Apps6 years ago
How to Book an Ola or Uber Using Google Maps
-
 How to6 years ago
WhatsApp Web: Everything You Need to Know
-
 Betting2 years ago
The Surge of Mobile Betting Apps in India
-
 Casino2 years ago
In-depth Review of Parimatch: A Top Choice for Indian Punters
-

 Apps6 years ago
How to Install WhatsApp Beta for Windows Mobile or Windows Phone
-
Sports4 years ago
10Cric India Bookmaker Review for Betting on Sports Online in 2022
-
Android Games6 years ago
LDPlayer vs Nox Player: Powerful Android Emulator for Gaming