Web Design
How to Use Bento Grids Design in Your Web Projects

Bento grids are a powerful design technique inspired by Japanese lunch boxes. They offer a clean, modular layout approach that can enhance the functionality and visual appeal of your web projects. Here’s how you can leverage bento grids for a stunning design.
What Are Bento Grids?
Bento grids are a modular system that arranges content in fixed-width columns, providing a cohesive and adaptable structure for diverse screen sizes. Just like a bento box, they create distinct yet unified sections on your web page.
Why Use Bento Grids in Web Design?
- Organized Layouts: Bento grids structure complex content, giving it a clean, organized appearance.
- Improved User Experience: Clear sections enhance navigation and make information easier to digest.
- Built-In Responsiveness: Bento grids easily adapt to various screens, keeping designs functional on any device.
- Creative Flexibility: Bento grids allow for experimenting with unique layouts and combinations, like asymmetry or nesting.
Step-by-Step: How to Implement Bento Grids
- Select a Grid Framework: Use a grid system like Bootstrap or Foundation as a foundation.
- Define Your Column Structure: Decide on the number and width of columns for a balanced layout (e.g., 12-column grid).
- Arrange Your Content: Place your elements within the columns to create a structured, eye-friendly design.
- Focus on Responsiveness: Use media queries to adjust layout for different screen sizes.
- Experiment and Adjust: Try unique layout variations, such as asymmetrical or nested grids, to keep the design engaging.
Essential Tips for Successful Bento Grid Design
- Balance Space and Content: Allow for sufficient white space to avoid overcrowding.
- Ensure Consistency: Uniform padding, margins, and fonts help create a cohesive look.
- Keep Text Readable: Use legible font sizes and contrasting colors.
- Optimize for Mobile: Ensure your grid scales seamlessly to smaller screens.
Final Thoughts
Bento grids offer a flexible, visually engaging design solution that enhances both functionality and aesthetics. By incorporating bento grids into your web projects, you can create compelling layouts that adapt beautifully across devices, ensuring a captivating and user-friendly experience.
Your domain’s logo is your brand’s visual identity online. Website visitors weigh your domain’s credibility through the logo. To design a worthy domain logo, the right tools are needed.
There are lots of design tools for creating a domain logo, ranging from the simple Zawa AI logo maker to the more decorated vector software, Adobe Illustrator. Your choice of a design tool for a domain logo might vary with your design experience, the complexity of the logo, and just how much you’re willing to spend on such a tool.
This piece looks at some of the best tools for designing a domain logo.
Identifying a Good Domain Logo Design Tool
Before you look at domain logo design tools, you must know how to pick the right one. Below are some attributes to keep in mind when choosing a logo design tool:
- Ease of Use
If you’re new to designing a domain logo, your ideal tool should be an easy-to-use one. No complicated design panels or tacky layout bars. AI logo makers fit in this category. You just submit the right prompt about your brand, and the AI tool creates several domain logo options for you.
- Flexibility
Some logo design tools are highly flexible, allowing for delicate tweaking of your domain logo. Excellent domain logo design tools support seamless adjustment of shapes, curves, and fonts. Professional-grade design tools have an edge with their vector graphics that enable logo scaling at advanced levels.
- Brand Kit Integration
The best domain logo design tools are built to scale your brand’s digital identity. Using the brand kit feature of these tools, you can flesh out your brand’s visuals, so they’re consistent with your colors, fonts, and style. You see such tools in the Zawa AI logo maker, Canva, and Adobe.
While some domain logo design tools are suitable for speed and user-friendliness, others offer precision and nuanced control. Your pick depends on what you intend to achieve using such tools.
5 Best Domain Logo Design Tools
Here are some of the best tools for designing a domain logo:
Zawa
This AI branding agent lets you create a logo for your domain using prompts. With its simple interface, beginners can generate multiple logo versions in minutes.
Zawa doesn’t require expertise in designing. You just submit your brand’s details, and the AI creates domain logo variations for your website.
Using Zawa, you get a full-on-brand visual identity with the right prompt. Changes are as simple as editing your prompts or resizing your preferred logo. And it has a brand kit system, so your branding stays consistent regardless of management changes.
This AI logo maker is the perfect tool for small businesses, website owners, and startups looking to scale on a budget.
Pros
- User-friendly interface
- Prompt-based editing controls
- Brand kit support
- Budget-friendly
- Nimble precision
Cons
- Flexibility depends on your prompting skills
Adobe Illustrator

For design experts seeking total control of their design experience, Adobe Illustrator is often the preferred choice. It’s one of the most flexible design tools, offering users a chance to spare no detail in logo creation. Its reliance on vectors ensures a precise attention to detail.
Adobe Illustrator is built specifically for experts. For beginners, a first time with the tool can be overwhelming. Add the heavy subscription fee, and you understand why only professionals and agencies rely on the tool.
Pros
- Highly flexible
- More editing controls
- Supports a consistent branding system
Cons
- Expensive
- Intense learning curve
- Not for beginners
Canva

Everyone knows Canva. It’s easy on the eyes, packed with lots of templates, and beginner-friendly. You can simply pick a logo template, edit and download the final domain logo. No need to spend time creating a logo from scratch. It’s often considered a go-to tool for those looking to create a domain logo quickly.
Canva also supports brand kit integration. You can easily store the visual elements of your brand for use in future endeavors. Like most software, it’s subscription-based.
Pros
- Beginner-friendly
- Loaded with editable templates
- Supports brand kit integration
Cons
- Not very flexible
- Unoriginal domain logos
- It can’t handle intricate domain logos
Wix Logo Maker

This tool uses AI to design a domain logo for you. On Wix, you provide details about your brand, and it uses that information to create a relevant domain logo. It also has multiple logo templates, which can be transformed into a domain logo for your website.
Wix Logo Maker doesn’t stop at designing a domain logo. It proceeds to build a visual identity for your brand. The design tool supports brand kit integration, so you can consistently revamp your brand identity over time.
One of Wix’s strengths is that it’s tailored specifically for a digital presence; making your domain logo clickable shouldn’t demand a frontend dev.
Subscriptions start with a basic free version, culminating in a heavily priced Max package.
Pros
- Easy to use
- Supports extensive branding
- Tailored to your brand’s digital identity
- Lots of logo templates to choose from
Cons
- Unoriginal domain designs
- Limited controls
- Lacks flexibility
CorelDraw

This is another tool that’s great for designing domain logos from scratch. CorelDRAW uses vector tools, letting users create unique domain logos. Though built for professional designers, recent updates now support beginners through AI integration.
The CorelDRAW graphics suite is perfect for extensive branding. Users can build their brand’s visual identity from scratch without relying on multiple tools. Like most professional-grade design tools, it has a wide range of editing controls, which leads to a more scalable logo design.
CorelDRAW is subscription-based. Its high fee structure means it’s only suitable for businesses with deep pockets.
Pros
- Unique domain logo designs
- Better precision thanks to a flexible control
- Professional-grade tool
- AI integration
Cons
- Not ideal for beginners
- High subscription cost
Final Thoughts
The best domain logo design tools are subjective, based on your situation. If you lack design experience but need a logo for your domain quickly, tools like Zawa AI logo maker are your best choice. You don’t have to spend a fortune on subscriptions, and the logos generated are original.
However, professional designers are better served with professional-grade tools like Adobe Illustrator and CorelDRAW. They get access to more precise controls, leading to more creative domain logos.

When I worked with my first client websites more than ten years ago, the main complaint sounded the same: “I can’t change anything without a developer.” Content stayed frozen, even if all they needed was to adjust a price or replace a photo. Since then, I’ve seen the same story repeat itself — businesses desperately need a simple way to manage their websites. That’s why admin panels are still so relevant for shop owners, startups, and corporate teams. In this guide, I’ll explain how to approach building an admin panel so it doesn’t feel like “scary code” but instead becomes a convenient business control center.
What Is an Admin Panel and Why Do You Need One?
An admin panel is an internal interface where the website owner or staff can manage everything users see. Articles, products, images, orders, users — all of this can be controlled without the risk of breaking the site.
For business owners, an admin panel is not just a tool but a way to reduce dependency on developers. It solves several problems at once:
- speeds up updates,
- makes processes transparent,
- reduces support costs.
Expert tip: If an admin panel feels excessive at the beginning, think not about today but about scaling. A year later, when your data grows, lack of an admin panel will cost you much more in chaotic support.
Key Benefits for Business Owners
- Speed. Add a new product or campaign in minutes instead of waiting for a contractor’s response.
- Control. Keep all processes in one place and easily track mistakes.
- Security. Role settings restrict access to sensitive areas.
- Flexibility. Adapt the panel to your niche — e-commerce, SaaS, or corporate websites.
Step-by-Step: How to Create an Admin Panel
The first choice you face: build a custom solution or rely on existing systems. Both paths have pros and cons.
Choosing the Right Approach
- Custom development. Maximum control but costly and time-consuming. Best for projects with unique business logic.
- CMS (WordPress, Joomla). Great for small businesses. Ready-made panels with plugins for extra features.
- Frameworks (Laravel, Django). Flexible but require a developer. Good for building tailored admin panels.
- Low-code/No-code tools. Ideal for startups or small business owners. You can assemble a working interface in hours with no coding knowledge.
Designing the Dashboard and User Roles
The panel should feel intuitive. I always recommend starting with a minimal set of sections: content, users, and orders. Later you can add analytics, integrations, and automation.
The crucial point is user permissions. A store manager doesn’t need access to server settings, and a copywriter shouldn’t control payments.
Adding Essential Features
Any functional admin panel must include CRUD operations (create, read, update, delete). That means adding and editing entries, viewing databases, and removing unwanted data. On top of that — basic analytics tools and content search.
I always suggest using WYSIWYG editors. They allow staff to edit text and images “like in Word,” removing the fear of working with raw HTML.
Securing Your Admin Panel
Here’s where many go wrong. Too often, panels are protected only by login and password. The bare minimum should include:
- two-factor authentication,
- user activity logs,
- regular system updates.
Skipping this is risky. I once saw a case where competitors gained access to an admin panel. The financial loss was in the thousands, and the fix could have been as simple as adding a second authentication layer.
Best Tools and Frameworks to Use
There are countless options, but I divide them into two groups:
| Approach | Examples | When to choose |
| Low-code/No-code | Retool, Appsmith | Startups, quick launch |
| Developer Frameworks | Laravel Nova, Django Admin | Complex projects, flexibility |
Don’t chase trends. Choose what fits your scale and resources.
Real-World Examples and Use Cases
- E-commerce. Managers upload products and photos, while the owner monitors real-time sales.
- SaaS service. Subscriptions, users, and payments are managed in one place.
- Corporate website. Marketing teams publish news and articles without developer involvement.
These examples seem obvious, yet I still see companies asking their contractors to “change the phone number on the site.” That’s a clear sign they urgently need an admin panel.
Creating a Logo for Your Admin Panel Project
Every admin panel becomes part of your brand. Even if it’s an internal tool, employees work with it daily. A logo inside the interface helps staff perceive it not as a “homemade app” but as a proper company product.
I recommend using AI logo maker from Turbologo. In just a few minutes, you can create a professional-looking mark that will fit seamlessly into your admin panel, business cards, or presentations. Small details like this build culture and visual consistency across the business.
Conclusion
An admin panel is not just code or technical complexity. It’s a business instrument that saves time, money, and frustration. The key is to define what you’re building: a simple system for a store or a sophisticated interface for a SaaS platform.
I often tell clients: an admin panel is like the steering wheel of a car. Without it, you won’t go far, no matter how good the engine is. Build a proper panel, and your site will stop being a burden and start working as a true business asset.
Frequently Asked Questions
- Do I really need an admin panel for a small website?
Yes, even for small businesses it matters. It speeds up updates and reduces dependence on developers. - What features should I start with?
At minimum: content management, user management, and order control. Everything else can come later. - Can I create an admin panel without coding?
Yes. No-code tools let you build a working interface in just a few hours. - How do I secure my admin panel?
Use two-factor authentication, set user permissions, and keep your system updated.


Pokémon GO Hack Guide: How to Join Mega Mewtwo Y Raids Without Traveling

How to Change GPS Location on iPhone Without Jailbreak

MetaTrader 4 or 5: Which Trading Platform Is Right for You?

Why Modern Web Applications Are Moving Beyond Basic Dashboards
YouTube Offline: What Is It, and How to Save and Watch a Video Offline?

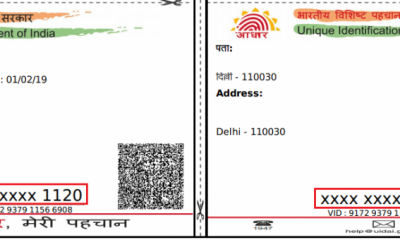
How to Download a Copy of Your Aadhaar Card

How to Book an Ola or Uber Using Google Maps

WhatsApp Web: Everything You Need to Know

The Surge of Mobile Betting Apps in India

In-depth Review of Parimatch: A Top Choice for Indian Punters
-
 Internet6 years ago
How to Download a Copy of Your Aadhaar Card
-
 Apps6 years ago
How to Book an Ola or Uber Using Google Maps
-
 How to6 years ago
WhatsApp Web: Everything You Need to Know
-
 Betting2 years ago
The Surge of Mobile Betting Apps in India
-
 Casino2 years ago
In-depth Review of Parimatch: A Top Choice for Indian Punters
-

 Apps6 years ago
How to Install WhatsApp Beta for Windows Mobile or Windows Phone
-
Sports4 years ago
10Cric India Bookmaker Review for Betting on Sports Online in 2022
-
Android Games6 years ago
LDPlayer vs Nox Player: Powerful Android Emulator for Gaming